3.2 KiB
| sidebar_position |
|---|
| 4 |
Flashing the firmware
Flashing the firmware is easy to do however it is important to do it correctly to prevent errors or board misconfiguration. If you haven't already, read the guide on downloading the firmware and setting up TunerStudio here.
Load the firmware onto the ECU
Once you have downloaded the latest firmware bundle, extract it then navigate through the console folder to fome_console.exe and launch it. Ensuring that TS is not running, plug your ECU into the computer. The console should detect the board and show a similar screen to below:
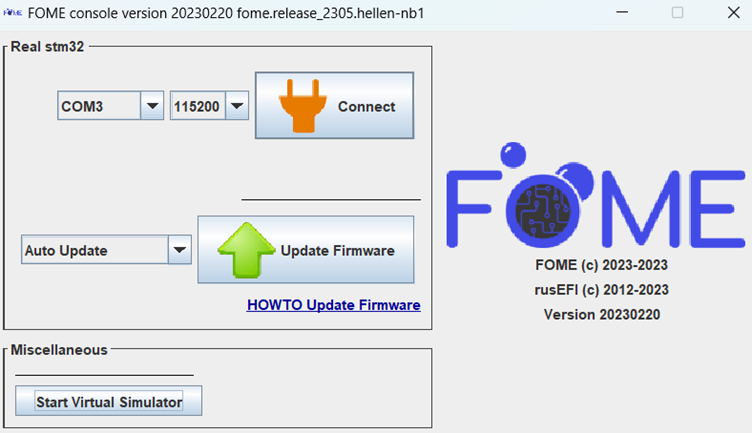
Click Update Firmware and leave the board plugged in until the prompt screen indicates that the update was successful. Only once the update has given this message, unplug and re-plug the ECU into the computer to reboot it.
If this does not complete successfully, the firmware may need to be loaded using STM32 Cube Programmer covered later.
Setting up TunerStudio
Open TS with the ECU plugged in, it should recognise that the ECU definition is out of date and come up with a prompt to download the new definition.
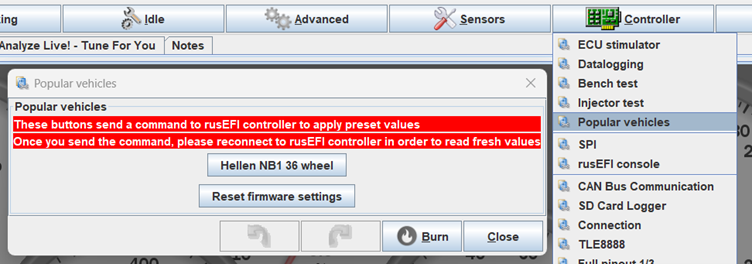
Next, under the Controller tab, open the Popular Vehicles menu and click the button to load the preset for your vehicle (not the button to reset the firmware settings).
Once the preset has been loaded, you can either start tuning or load your tune from the older firmware versions under File > Load Tune (msq). After that, the update is complete!
Loading firmware through STM32 Cube Programmer
In the event that your firmware update fails and the computer fails to recognize the ECU when plugged into it, the firmware needs to be loaded manually using STM32 Cube Programmer. When the computer fails to recognize the ECU, the firmware has not loaded correctly so the console is unable to put it into bootloader (or DFU) mode to update it. This process manually puts the ECU into bootloader mode then uploads the firmware file to it.
Firstly, download and install STM32 Cube Programmer here.
On the ECU, you will then need to access the main board of your ECU to find the boot/DFU pins/button. With the ECU un-powered, short the two boot pins (or push and hold the button) while plugging the ECU into the computer. Once plugged into the computer, the pins can be separated.
In the programmer, select the USB tab on the right and refresh the port in the right side menu until a DFU is detected. Click Connect to connect the ECU to the programmer. Click the Read button to read the device memory and to validate that the ECU is connected.
Once validated, click the Open File button and load the file marked fome.bin within the firmware bundle downloaded earlier. This is a binary file containing the ECU firmware. Now click the Download button to write this firmware to the ECU. Give it up to several minutes to download and once the status console confirms successful download, disconnect from the programmer then unplug the ECU and plug it back in. The ECU should now connect to the computer and TS normally again.